Automate e-mail with Intelligent Agents
Intelligent Agents is an automated email notification feature that can assist instructors when defined activity occurs in a course or when there is a lack of login or course entry. Intelligent Agents can be used to make personalized communication more efficient.
This page is sectioned into three parts:
- Settings and setup
- Use cases and examples
- Recommendations and pitfalls
You can choose to whom the automated email is sent, you or fellow instructors, students or both. For more information to help you decide, and other important considerations, please read the recommendations and pitfalls sections.
Intelligent Agents that are copied or imported from another course, will be set to Inactive by default.
Intelligent Agents that are copied or imported from another course do not have their schedules copied over automatically.
-
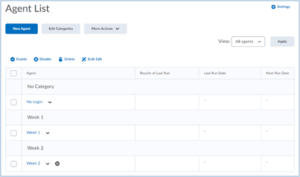
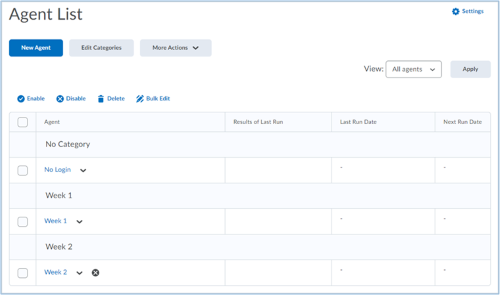
- Go to Course Admin. You will find Intelligent Agents either alphabetically, or in the communication category.
- When you open the Intelligent Agent tool, you will see the Agent List page.
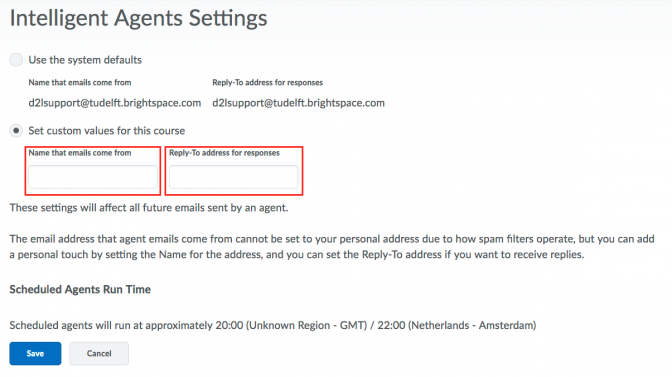
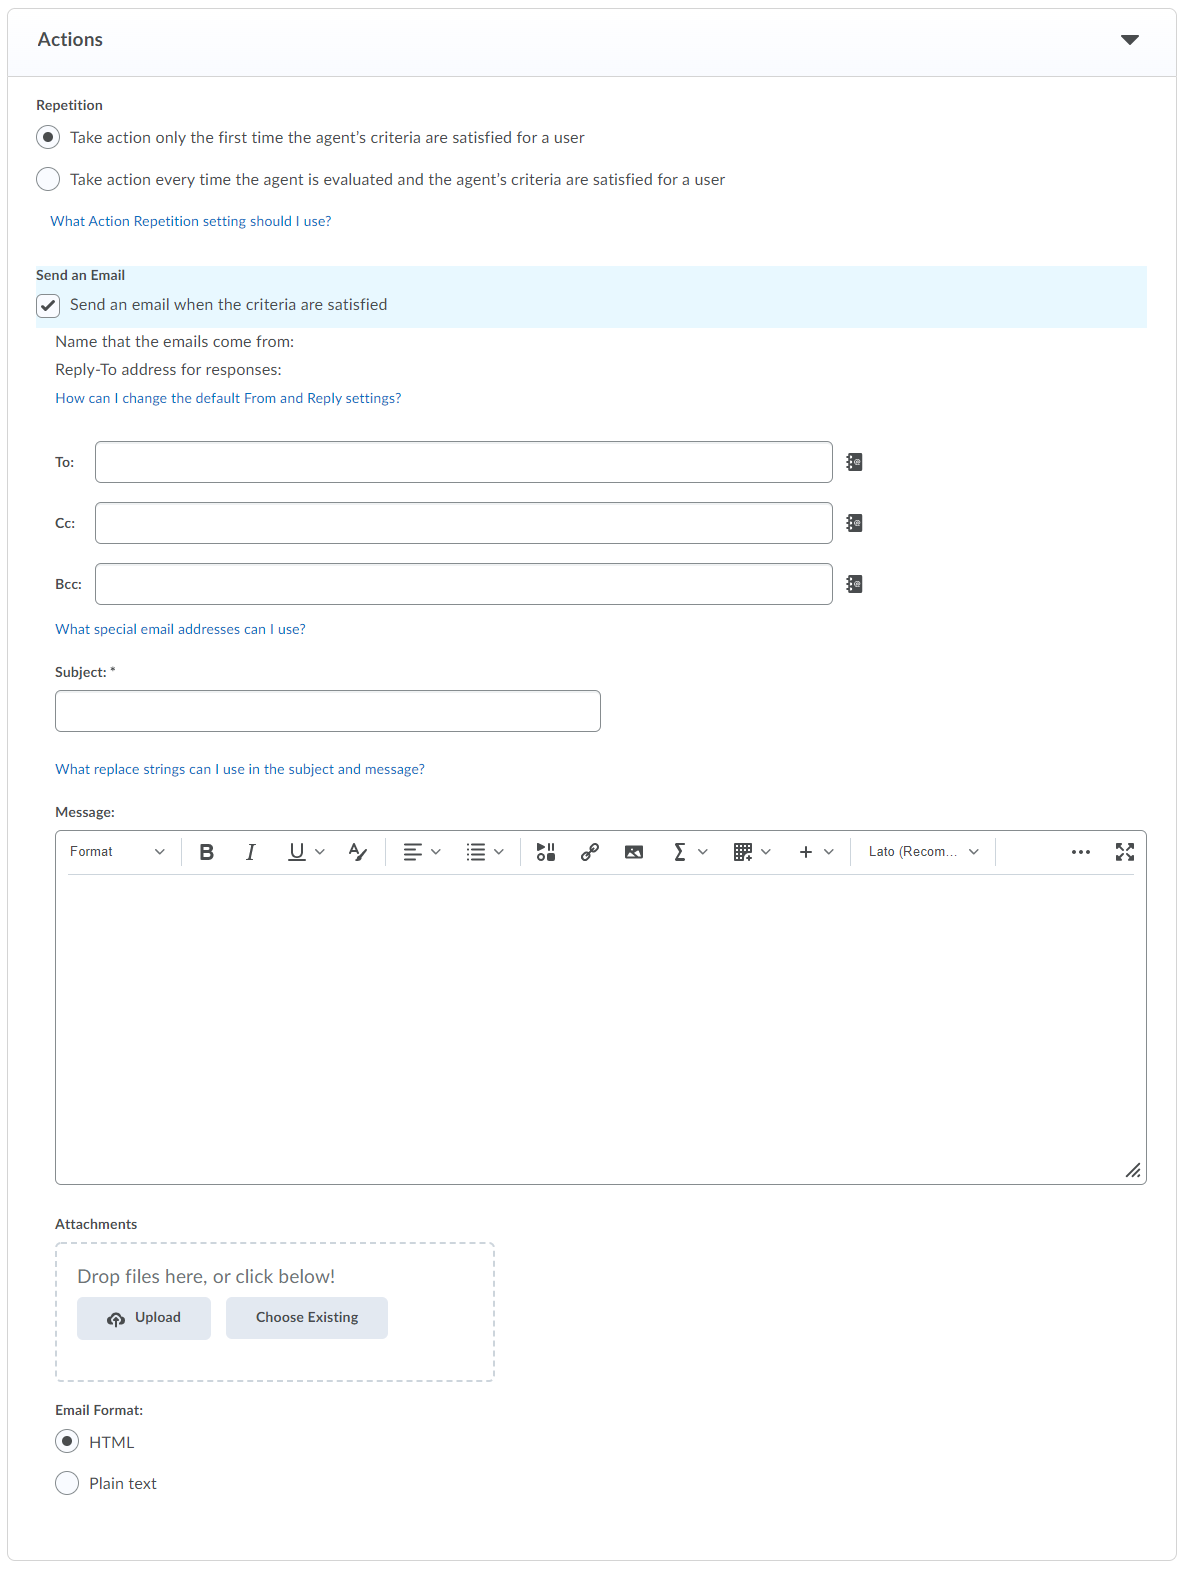
- Assuming that it is the first time that you create an Intelligent Agent in your course, the first thing you should do is change the default Settings. After clicking Settings, set a custom value for Name that emails come from and the Reply-To address for responses (see bottom image).

- You should add your name or a name for your course team and a Reply-To address for responses. Click Save when you are finished.
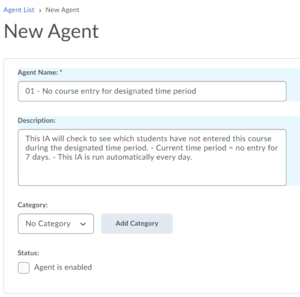
- You then return to the Agent List page. Click New Agent to start creating a new Intelligent Agent. For this guide, we will use the example of checking if a student has not accessed our course for 7 days.
- You have to put the Agent Name in, and we suggest writing a detailed Description in the optional description field. You and your team will see this information, so it’s wise to know its parameters.
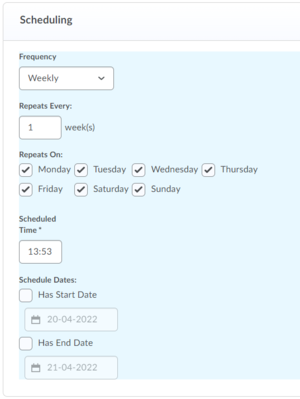
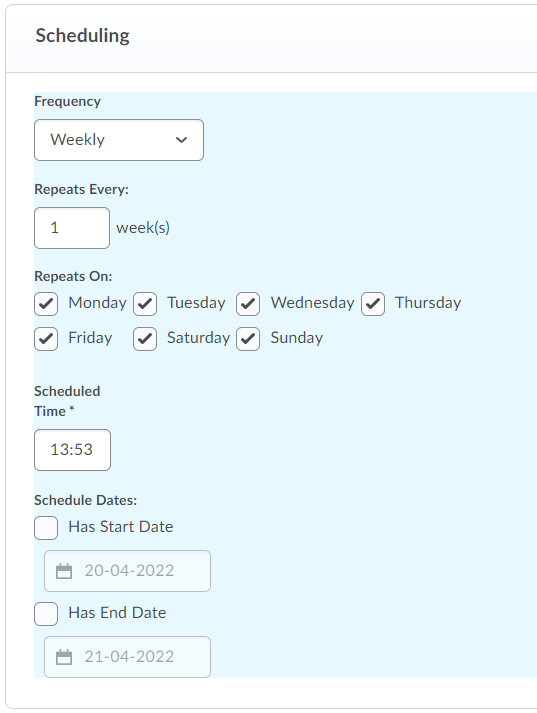
- Then we continue with the Scheduling Using the dropdown menu you can select the preferred schedule. The choices are: No Schedule, One-Time run, Daily, Weekly, Monthly or Annually; and whether it repeats every day, every other day, etc. We decided to repeat it every day. You can also include a Start and/or End Date.
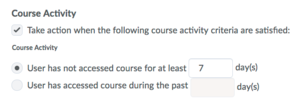
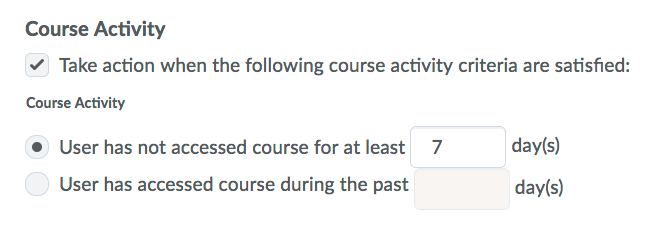
- Next, we must determine the Agent Criteria. You could look for Login Activity and Release Conditions, but we are not doing that with this agent. For this example, we will look for Course Activity by each student. So, the Intelligent Agent will be triggered whenever a “User has not accessed the course for at least 7 days”. This is a very simple intelligent agent, and no other criteria are needed.
- Next is the Actions section.
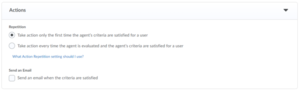
- The Action Repetition represents whether the action should be repeated after it has been satisfied once. For this case, we do want to repeat the action, so we select Take action every time the agent is evaluated and the agent’s criteria are satisfied for a user. However, in some cases you might want to take action only for the first time the agent’s criteria is met, to avoid multiple emails sent to students or instructors.
- You can then choose to send an e-mail when all criteria are satisfied by selecting the checkbox under Send an e-mail.
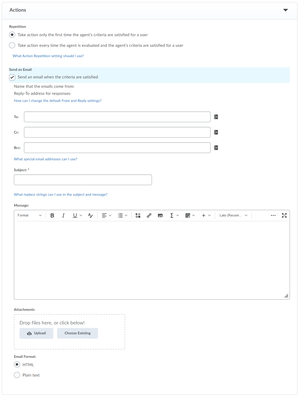
- Make sure that you have edited the custom settings so that the emails come from your name and the reply is to your email address (see Step 2). For this agent, the e-mails are not shown as they will be replaced by the emails you entered in step 2. This email also automatically populates the ‘To’ field. If the agent should send the message to the student, you would use the replace string {InitiatingUser} instead of the e-mail address. For more details about Replace Strings, make sure you visit our page. Some Replace Strings that can be used:
- {OrgName} – The name of the organization. (TU Delft)
- {OrgUnitName} – The name of the org unit, i.e. of the course.
- {OrgUnitStartDate} – The start date specified for the org unit.
- {OrgUnitEndDate} – The end date specified for the org unit.
- {InitiatingUserFirstName} – The first name of the initiating user.
- {InitiatingUserLastName} – The last name of the initiating user.
- {InitiatingUserUserName} – The username of the initiating user.
- {LoginPath} – The address of the login path for the site. (URL)
- {LastLoginDate} – The date the initiating user last logged in.
- {LastCourseAccessDate} – The date the initiating user last accessed the course.
-
You can also add attachments to email messages when creating and editing Intelligent Agents.
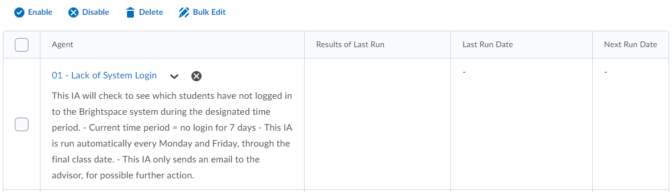
- Click the Save and Close button. You are then brought back to the main screen for the Intelligent Agents. You will now see the agent name and description on the screen. If it is set to run on a schedule, you will see that run date as well, as shown here on the right side.

- This image shows a good example of why we suggest that you write a detailed description. At a glance, we can see what this Intelligent Agent is all about. We consider that to be an effective practice in using Intelligent Agents.
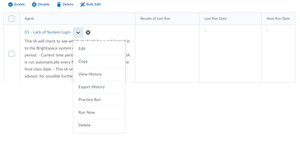
- Now that we have an Intelligent Agent created, it is possible to access its settings using the drop-down arrow.
Going down the list, you can Edit the agent, you can do the same by clicking on the blue link for the agent name. You can make a Copy of this agent if you want to create a second agent that is very similar. You can View History of the different runs for this. Furthermore, you can execute a Practice Run, which we will look at next.
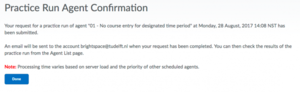
- One useful feature of the Intelligent Agents tool is the Practice Run. With it, we can check if the agent is properly formed. The beauty of the practice run is that it tells you if it would execute; in other words, if any students meet the criteria, but it does not actually execute and send the email. You will receive an email message that tells you the results of the practice run.
- Now that we have completed a practice run, we have new information in the fields for the Results of the Last Run, and the Last Run Date. If we wanted to see who the 6 users are that were identified by the Intelligent Agent, we would simply click on that link in the column for the results of the last run.

- If I view the History page, which right now only has one practice run on it, I will see the same information I saw before (see image). However, this history page becomes much more valuable after you have run the agent multiple times.
-
Intelligent Agents are great but not always the best choice. When thinking of using them, you should consider: Does using intelligent agents here make sense or is there is a better way?
Use Intelligent Agents when there isn’t a better way of communicating:
- Would a Notification work better?
- Would a News Announcement work better?
- Would a personally crafted email work better?
- Would a discussion board posting work better?
For detailed setup and guidance on use cases/examples please visit this separate page with detailed examples and settings.
Some common use cases:
- Welcome message: When a new student enrols for a course, he or she receives a message with the additional required information for the course.
- Reminder message: When a student has completed 50% of a course, a message can be sent stating the progress and explaining the rest of the course.
- High-score: A student receives a high score for an assignment or quiz. A message can be sent to congratulate the student.
- Low-score: A student receives a low score for a quiz or assignment. A sympathetic message can be sent advising how to take a re-sit or how to get a higher score for the next assignment or quiz.
- Group Enrolment: When using groups in a course for an assignment, an Intelligent Agent can be set up to send extra instructions on what is expected.
-
Here are 7 effective practices recommended:
- Think carefully about whether you want the Agent to email the student, you, or both.
- When the agent sends you a notification and not an automatic e-mail to the student, be prepared to contact the student.
- Use Intelligent Agents sparingly: repetitive emails may lose effectiveness, reserve use for the most important items.
- Carefully consider the implication of Manual versus Automatic running Intelligent Agents. For example, manually triggering an agent allows you to determine when the timing is right.
- Use the Agent Name and Description fields to your own benefit by making the name easily recognizable and using a clear description of what the agent is intended to do.
- If you use an Agent to email yourself, and if you expect many e-mails, create rules in your inbox to highlight them.
- Intelligent Agents become more valuable as the class size increases.
And potential pitfalls:
- Be careful when using Replace Strings, ensure that they are properly formed and use them sparingly. Using them too often can feel unnatural and allows for spelling mistakes to slip in.
- Be aware of what happens to intelligent agents when copying a course from term to term; they are inactive by default and the settings will still have the old dates attached.
- Agents are not included when exporting a course
- Students cannot reply to the primary “From” on Agent emails; make sure you provide a reply or contact method in the body of the message, either with a mailto: link or by cc-ing an email address.


Need support?
Get in touch with us! We are happy to help.
- Teaching-Support@tudelft.nl
- +31 (0)15 27 84 333